You can create fabulous baby footprints simply using flour as a main ingredient for your baby footprint art and craft project to make great keepsake or memory treasures.
One of the wonderful ways which you are able to capture the memory of your baby’s small feet is by creating a footprint mold using dough. It’s an easy, quick and affordable way of making baby footprint art without buying an expensive kit.
This DIY approach can be a lot of fun too because you learn how to be resourceful. In fact here’s a simple way of tackling your baby footprint making project. To get started simply head into the your pantry or kitchen and take some flour, salt and water which are the key ingredients you’ll need to create a mold for your baby’s footprint.
Depending on how you want to approach your process or how creative you want to get, you can add some twists but here a list of some of the things you can also include:
- 1 cup flour – use regular/all-purpose flour;
- 1/2 cup salt and 1/2 cup warm water - measure and pour the flour and the salt into the bowl, after that mix the dry ingredients with the wooden spoon to incorporate them;
- Small bowl and wooden spoon;
- Rolling pin, baking sheet and butter knife; dowel or straw;
- Paintbrush, Pencil, Acrylic paint, and Ribbon.
Making the salt dough
- Simply combine 2 cups of flour with 1/2 cup of salt.
- Heat up 3/4 cup of water until it is hot enough, and add it to the flour and salt mix.
- Knead the dough until it's thoroughly combined. The best indicator is when the mixture has a dry, Play-Doh-like texture, and then you can be almost sure it’s good to go.

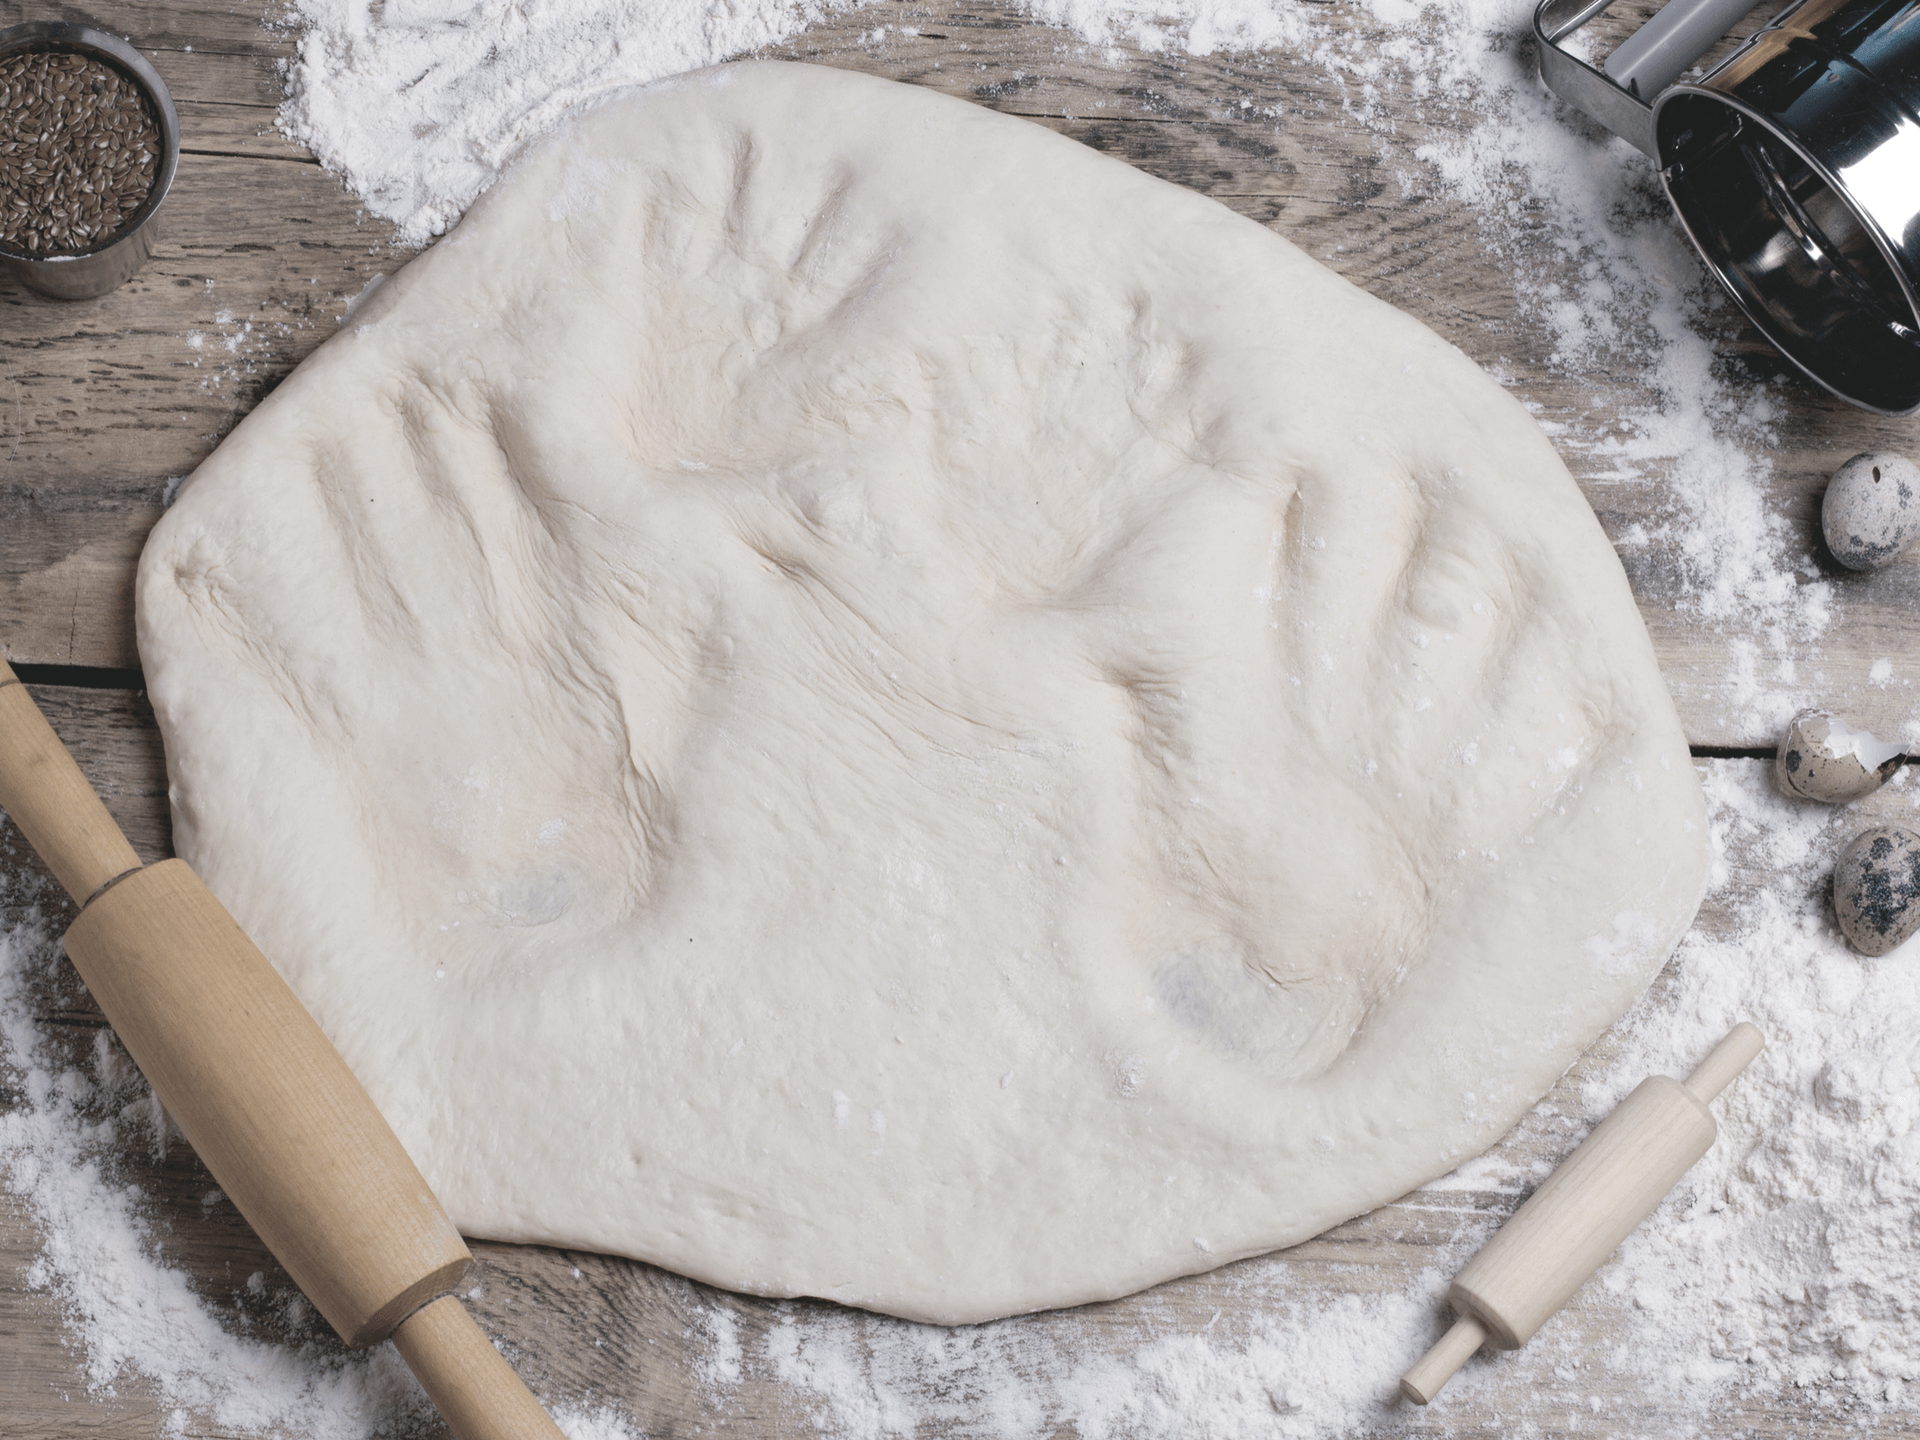
Getting the art of footprint impressions right
When you get to this stage of making baby footprints using flour, what you need to do is then separate the dough into two portions before rolling each piece into a flat circle which you then go on to position for your baby to dip their little feet into so that you can produce the prints.
Make sure you gently assist your baby and take all precautionary measures. You can repeat the process to get the ideal impressions of your little one’s precious footprints.
One excellent tip to always remember is that if you’re planning to make the impressions into ornaments, then you should poke holes into the top before baking the baby footprint art.

Naturally drying the flour baby footprints
If you want to choose to let the dough air dry, rather than use your oven’s drying function; just make sure you keep in mind that it will take longer.
Sometimes it may take up to a full day or more depending on the thickness of your dough. But if you’re patient enough then you can certainly use the air drying method. Is not a special memory worth waiting a couple of days for?
I certainly think so because in the end, you will be getting a perfect impression of your baby's hands or feet.
But if you live in an area with high humidity, it is possible your dough will not dry out at all and then you may need to use your oven to help out with the drying process.
MORE DIY CRAFT & PROJECTS TIPS: Best Materials for Baby Handprints & Footprint Keepsakes
Tips on baking brilliantly when making baby footprint art
The trick is to start with preheating your oven to between 250 and 350 degrees Fahrenheit. You then want to place the footprint art on a cookie sheet with possibly a silicone liner to make sure there is no sticking.
Following that you will want to go on and let it bake for one and a half to three hours. You should aim to leave them in the oven for 2-3 hours, turning at least once during the drying out process. If they are still doughy after all that time, turn off the oven and leave them in there for another couple of hours to let them harden.
Alternatively, you can bake the molded footprints in the oven at 200 degrees Fahrenheit for one hour. Check the progress of the drying after this time. Continue baking the footprints until the dough feels hard and dry - up to an additional hour. Some people prefer baking the footprints at oven temperatures up to the same range of roughly 350 Fahrenheit although baking at a lower temperature prevents excessive browning.
Once you’re done with the baking you need to hang the footprints by threading a ribbon through the hanging hole and tying the ribbon in a bow.
RELATED DIY CRAFTS & PROJECTS: Baby Handprint Gift Ideas
Paint the prints
Before you actually start to paint you can also lightly sand any imperfections that you want to correct. It will be obvious to you that because of baking your baby footprint dough will be browned and this is the point where you now need to use your creativity to custom paint the footprints.
So depending on whether you’re making them as baby footprint gifts or you’re simply experimenting with baby art that will ultimately influence the nature of your designs. Acrylic works best on salt dough.
Remember to write the name of the baby and date on the back of the print so that you know exactly when the print was made. Add a layer of sealant, and thread a ribbon through the hole to give it good form and so that you end up with a perfect baby footprint.
Paint the footprints with acrylic paint in whatever design or color you desire. Set aside to allow the paint to dry. Get creative with your choice of colors and designs to make them standout.
As you can see, this DIY baby footprint craft is a great and simple way to make a keepsake treasure for grandparents, for dad or even for mom. It makes a memorable gift for Christmas, Easter, birthdays or even Mother’s Day. It’s an easy way to capture your newborn’s tiny hands and feet (they’re so cute how could you resist?) and turn them into a gift that the recipient is sure to cherish for a lifetime. If the DIY approach isn’t your cup of tea, then try Bubzi Co.'s Baby Handprint and Footprint Air-Drying Clay Frame Kit. Everything you need to create a handprint and footprint clay frame is included in the kit. It’s a great idea if you don’t have the time to make your own salt dough but still want to capture the magic that is those early moments with your newborn.

Photo credit: Bigstock, Pixabay